Tuesday, January 27, 2015

Homemade Fresh Peach Cobbler

Oh man, is there anything better than homemade fresh peach cobbler? My mouth is watering at the thought of making some again!

Gary was excited too, seeing as he hasn't done a lot of baking since we started our adventures in the kitchen. He got this peach cobbler recipe from our friend Sarah and it was quite delicious, so let's hope we get the same results!

We started off by peeling the peaches and them cutting them up into slices to remove the core. With a new kitten in the house, this proved to be a bit more difficult than we had anticipated...

Kovu's favorite napping spot: my shoulder. 

After many distractions, we eventually succeeded to peeled and slice 4 peaches. At this point, we gave up and decided to make a half recipe and see how it would turn out. We were only going to be three people for supper anyway, because one person had to cancel, so I'm sure it'll be enough for everyone. And this way, we'll still have peaches leftover if we want to make a second batch later in the week! 

Note: I guess peaches don't keep very well on the counter, but we managed to make the second batch the following day when one of the peaches started going bad

Here you can see the peach cobbler, all garnished and ready to be baked!

 Yum! Gotta love that brown sugar & cinnamon mixture on top!

I had planned on taking a before and after shot, but it looked and smelled so good that I accidentally served some before remembering to take a picture! Oops. 

The peach cobbler after being baked in the oven, with a few bites missing. ;) 

Wowza, this tasted amazing!

We hope you can enjoy making this fantastic desert and that it turns out just as great as ours did, despite cutting the recipe in half. 

Fresh Peach Cobbler

Prep time: 20 minutes / Cook time: 40 minutes
Total time: 1 hour
Makes 6 servings

Ingredients: 
  • 8 fresh peaches, peeled, pitted and sliced into thin wedges
  • 1/4 cup white sugar
  • 1/4 cup brown sugar
  • 1/4 tsp ground cinnamon
  • 1/8 tsp ground nutmeg
  • 1 tsp lemon juice
  • 2 tsp cornstarch
  • 1 cup all-purpose flour
  • 1/4 cup white sugar (yes, again)
  • 1/4 cup brown sugar (also, again)
  • 1 tsp baking powder
  • 6 tbsp butter, cut into small pieces
  • 1/4 cup boiling water (or more)
Plus: mix together 3 tablespoons white sugar with 1 teaspoon ground cinnamon on the side. 

Directions: 
  1. Preheat oven to 425°F.
  2. In a large bowl, combine peaches, 1/4 cup white sugar, 1/4 cup brown sugar, 1/4 tsp cinnamon, nutmeg, lemon juice, and cornstarch. Toss to coat evenly, and pour into a 2-quart baking dish. Bake in preheated oven for 10 minutes. 
  3. Meanwhile, in a large bowl, combine flour, remaining white sugar and brown sugar, and baking powder. Blend in butter with your fingers tips, or a pastry blender, until mixture resembles coarse meal. Stir in water until just combined. 
  4. Remove peaches from oven, and drop spoonfuls of topping over them. Sprinkle entire cobbler with sugar and cinnamon mixture. Bake until top is golden, about 30 minutes. 


Loaded Vegetable Soup - Loaded is right!!


Let me just start out by saying that the original recipe makes WAY too much soup. Gary and I usually make half recipes anyway, and a half recipe of this couldn't even fit in our biggest pot! We probably should have checked the ingredients before starting...

We got to work right away and cut up ALL our veggies - even celery. We did omit the potatoes and extra tomatoes though, due to lack of space after we had started putting everything in the pot. We also never buy fresh herbs so Gary decided to wing it with dried spices. It didn't help that the serving sizes were all messed up so we'll definitely try to get the taste right next time.

Big pot of Loaded Vegetable Soup!

One serving out of ten; that's a lot of soup!

Here is our version of the recipe, followed by the link to the original recipe: 

Loaded Vegetable Soup

Ingredients: 
  • 3 tbsp olive oil
  • 2 large carrots, peeled and sliced
  • 3 sticks celery, chopped
  • 1 onion, chopped
  • 2 garlic cloves, minced
  • 1 green pepper, chopped
  • 1 red pepper, chopped
  • 1/2 head of broccoli, cut into small chunks
  • 1/2 cup mushrooms, sliced
  • 1 15-ounce can diced tomatoes, with juices
  • 1 15-ounces can corn, drained
  • 1 potato, scrubbed and diced with skin on (omitted from this recipe due to lack of space)
  • 4 cups water
  • 2 tbsp tomato paste
  • 3 tbsp dried basil
  • 1/2 tsp freshly ground black pepper
  • 1/4 tsp red pepper flakes
Directions:
  1. In a large saucepan, drizzle olive oil and warm on medium heat.
  2. Start with the carrots and saute your vegetables.
  3. I chop as I go, adding in one vegetable at a time until they are all sauteed while stirring.
  4. After all the vegetables are added, slowly add the water, tomato paste, basil, black pepper and red pepper flakes. 
  5. Stir, cover and turn heat to low-medium.
  6. Let simmer on your stove top for 45 minutes to 1 hour.
  7. Turn off the heat.
  8. Serve hot with fresh Mile High Biscuits!
Note: This recipe is definitely missing a little something. Maybe some vegetable broth or some added thyme and oregano. We'll update next time we try out this recipe. If you have any suggestions, please feel free to leave us a comment!

Original recipe found at: http://www.cozycountryliving.com/loaded-vegetable-soup/

Saturday, January 17, 2015

Three Sister Empadas

I think it's about time we get back on track with posting some new recipes, don't you? Here's what Gary and I decided to cook up last night: Three Sister Empadas. We found this recipe on Pinterest a little while back and decided to give it a go.

First set back of the night was that we ran out of eggs yesterday and forgot that we needed to go get some more. Fortunately, it was good timing because eggs are on sale today at Shopper's Drug Mart for $1.99! And as a side note, you can get $0.25 back this week if you upload your receipt on the Zweet App!

After we returned from the store, Gary and I got to cooking. We started out by making the dough, which requires whole-wheat flour and all-purpose flour, although these could easily be replaced with gluten-free flour if you can't do regular flour. We mixed the ingredients - omitting the salt as we usually do - and finished with a nice looking ball of dough. We wrapped that up in some plastic wrap and set it in the fridge for an hour or so to cool. While waiting for the dough to be ready, we put the veggies in the oven and then it was time to wait. Gary thought it would be fun to pass the time by playing with our new kitten, Kovu. I think they're going to be best friends.

Kovu and Gary hanging out in the living room.

Then it was time to get the filling ready. We took the veggies out of the oven and mixed them up with the beans, green onions, cheese, and all the spices. Gary doesn't like chilies so we opted not to use those, and I reaaaally dislike cilantro so we are definitely not using that. 

Mixed veggies with cheese and spices for the empada filling.

Now the dough is ready to be pressed and divided to make the empadas. We only did a half recipe so we divided the dough into 5 parts and smooshed them before placing filling in the middle and folding them up. Note: Flatten them pretty well, there's quite a lot of filling for the amount of dough. 


And we can't forget to use the egg wash to make sure everything is sealed up. Here's what they looked like, all ready to go into the oven.

Three "Three Sister Empadas"

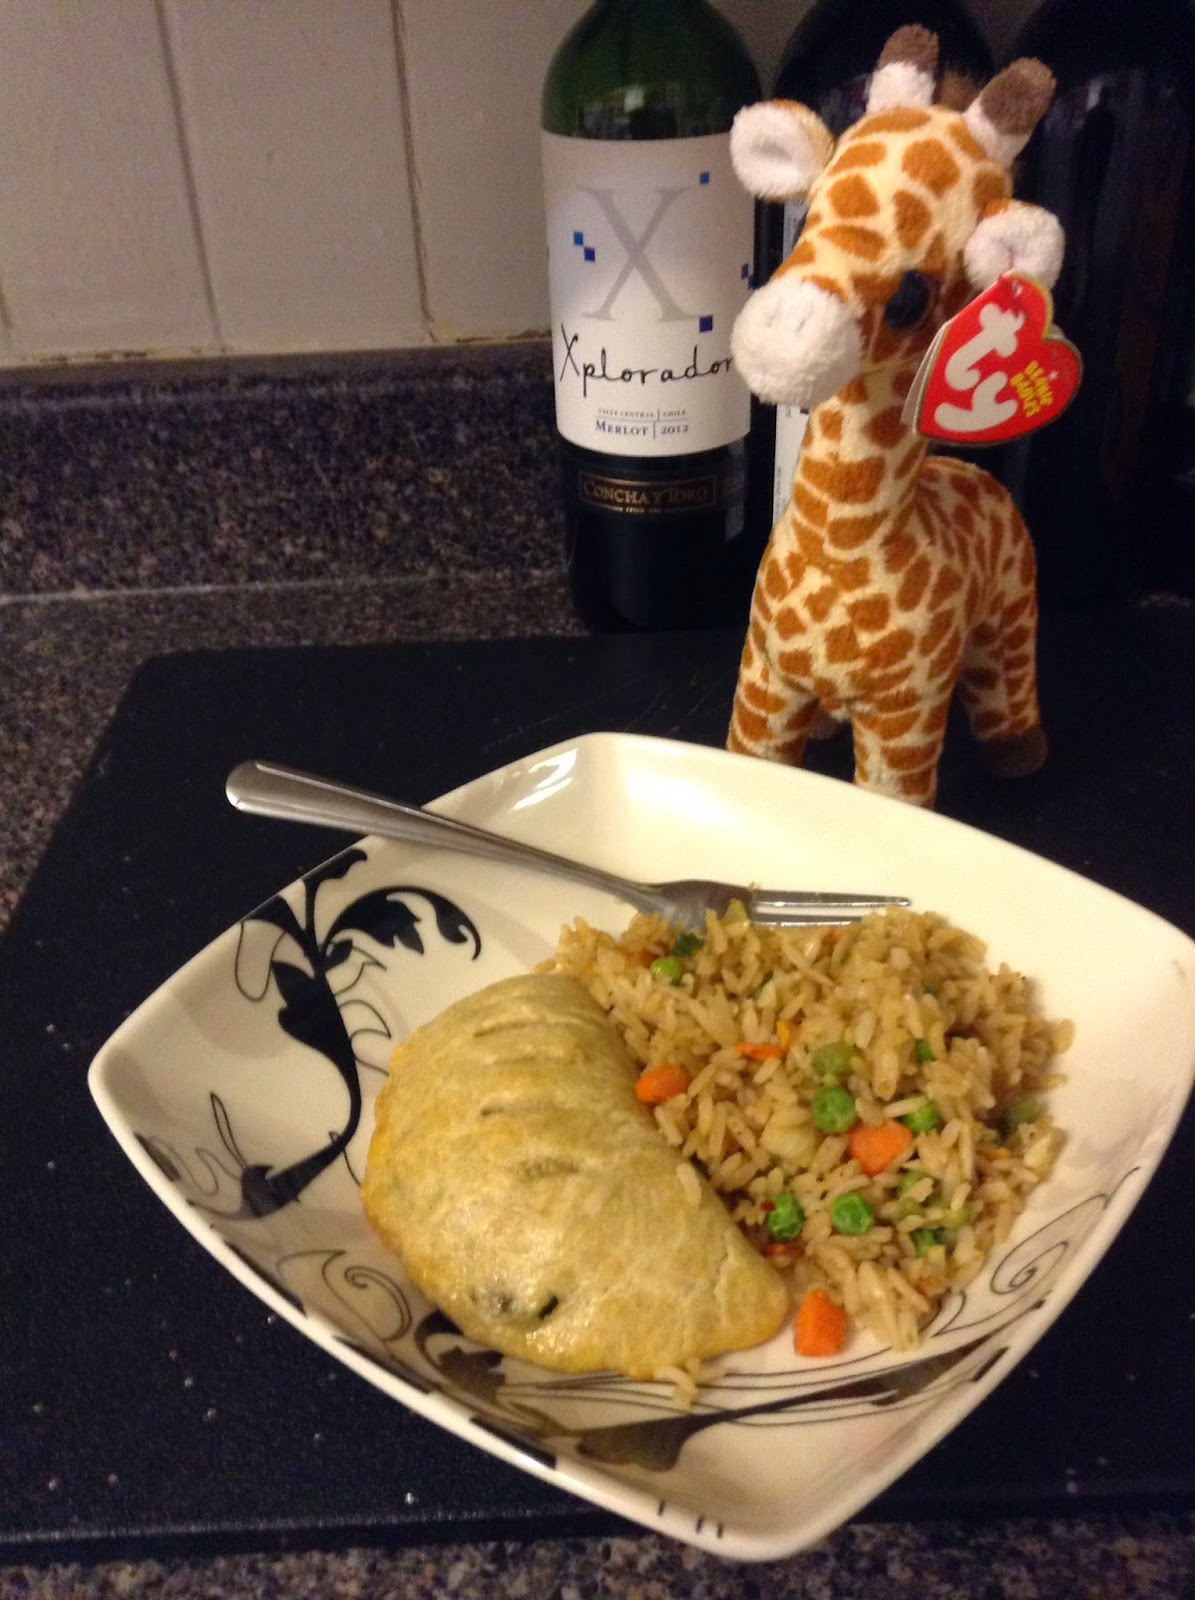
After some more waiting around - and some wine - we took the empadas out of the oven. They smell so good! And lucky us, we have some leftover rice from yesterday's supper at Tanya & Matt's. Wonderful combo! 


Three Sister Empadas
Makes 10 empadas
Total time: 2 hours

Ingredients: 
For the dough
  • 1 1/2 cups (225 grams) whole-wheat flour
  • 3/4 cup (105 grams) all-purpose flour
  • 1/2 cup (8 tablespoons) unsalted cold butter, cubed
  • 1 large egg
  • 1/4 cup ice water, plus more as needed

For the filling:
  • 1/2 pound zucchini (2 medium), cut into 1/2–inch cubes
  • 1 cup corn kernels (from 1 medium ear) or 1 cup frozen kernels, thawed [Oops, we accidentally used canned corn; not the greatest idea since they are already cooked, therefor some of it burned in the oven.]
  • 2 tablespoons extra-virgin olive oil
  • Salt and freshly-ground black pepper
  • 3/4 cup canned black or pinto beans, rinsed and drained 
  • 3/4 cup shredded cheddar cheese
  • 1/2 cup thinly-sliced green onions 
  • 1 teaspoon ground cumin
  • 1/4 teaspoon chile powder
  • Sour cream, for serving, optional
  • Salsa, for serving optional

For the egg wash:
  • 1 large egg, beaten
  • 1 tablespoon water


Directions: 
  1. To make the dough, combine both flours in a medium bowl. Using a pastry blender or your fingertips, cut butter into the flour mixture until it’s roughly the size of small peas.
  2. In a separate small bowl, whisk together egg and water. Pour over dry ingredients and mix with a fork until dough begins to come together. If still shaggy, add additional water to help the dough come together, 1 tablespoon at a time. Dump out onto a well-floured surface. Knead dough a few times and carefully gather together into a ball. Wrap in plastic wrap and place in the refrigerator to chill for one hour.
  3. To make the filling, first preheat the oven to 400°F. Line a large rimmed baking sheet with parchment paper.
  4. Spread the diced zucchini and corn on the baking sheet. Drizzle with olive oil and a few grinds of salt and black pepper. Roast for 20 to 25 minutes, or until the zucchini are softened and slightly browned around the edges.
  5. Transfer to a bowl. Fold in the black beans, cheese, green onions, cumin and chili powder.
  6. In a small bowl, prepare the egg wash by mixing together the beaten egg and water.
  7. To assemble the empanadas, divide the dough into 10 equal portions (about 55 grams each). Shape each portion into a ball and roll into a 5- to 6-inch circle about 1/8-inch thick on a cool, lightly-floured surface. Working one at a time, place 1/3 cup filling into the center of the circle. Moisten the edges with the egg wash. Fold one edge over the top of the filling to create a half-moon shape and crimp the edges to seal.
  8. Place the empanada on a parchment-lined baking sheet, brush tops with egg wash, and repeat with remaining dough. Slice a few small slits in the center of each empanada to help release steam while baking.
  9. Bake at 400°F for 22 to 30 minutes or until lightly browned. Serve with sour cream and salsa, if desired.
NOTE: You can easily freeze these empanadas, either baked or unbaked, to enjoy later on a busy weeknight. To do so, wrap the empanadas well in aluminum foil and label. To bake the empanadas, preheat the oven to 400°F and bake for 30 to 35 minutes or until golden brown and hot all the way through. Cooking time is roughly the same to warm previously-baked empanadas or to fully cook the unbaked empanadas. Do not thaw the empanadas before baking — simply toss them in the oven frozen.

Thursday, January 15, 2015

Mile High Perfect Biscuits

One thing Gary has been wanting to try out is homemade biscuits. But god knows where to find a good recipe when your giraffe-grandma never passed down her family recipe. So we decided to ask around and do a bit of online research and chose a recipe found on Pinterest entitled "Mile High Perfect Biscuits." Gary had been interested in trying a vegan recipe, but since we didn't have most of the ingredients needed, we just went with a regular one, but we will be replacing buttermilk with Almond Milk. Let's see how this goes!

Gary got to work right away and starting mixing all the dry ingredients together. He then followed the directions and made a "well" and added the wet ingredients. Let's just take a moment here to say we're not 100% sure what the purpose of a well is, but we did it anyway.

Last ingredient is the butter, cut into cubes. Gary agrees that this was the funnest part! Then came time to smoosh everything down before cutting out the biscuits. It took us a while to find something to cut out the biscuits with because we actually don't own a round cookie cutter, but we found a container cover that was just right. :)

When we were all done cutting them out and having placed them on a baking sheet, we felt confident that they would turn out quite well. Fingers crossed, we put them in the oven and waited patiently!

Here is the final result:

Note: We've already eaten 3 of them, which is why there's empty space on the baking sheet.

Well, they ended up being a lot bigger than I expected so we had to bake them a good 15 minutes or so longer than the recipe suggested, but they were mouth-watering-ly delicious!! We ate three right away and I'm drooling at the sight of them. Gary would like me to inform you all that they aren't as tasty on the following days, but good nevertheless.


Thursday, January 1, 2015

A new year brings new recipes

Gary and I are excited to announce that now that we're back home and settled in, we're getting back to cooking. This time, we're giving ourselves a 3 month-long challenge of no restaurants, which means we have so many new recipes in store for you all!

We hope you all had happy holidays and we want to wish everyone a very happy new year! Let 2015 be filled with love, peace and joy; but most importantly, delicious meals. ;)

Lots of love!
Gary & Carmen
xox